
As a part of the Opera, I was required to do my own make-up. I looked everywhere and had a hard time finding tutorials on how to look like a goat. There were animals of all sorts, but only a few goat makeup ideas. I had to improvise!
For any of you that want to look like a goat (satyr maybe?) for Halloween or anything else, this is the tutorial for you!
Just so you know, this is stage makeup, so it looks significantly better from farther away. If you want it to look better up close, you will want to replace the face paint for make up (or buy better face paint...)
Materials:
-Eyeshadow (3 shades of whatever main color you want: I did Brown)
-Eyeliner (black)
-Black, white and [insert main color here] face paint (I used face paint crayons from Walmart)
-Black lipstick (optional)
-Eyeshadow (3 shades of whatever main color you want: I did Brown)
-Eyeliner (black)
-Black, white and [insert main color here] face paint (I used face paint crayons from Walmart)
-Black lipstick (optional)
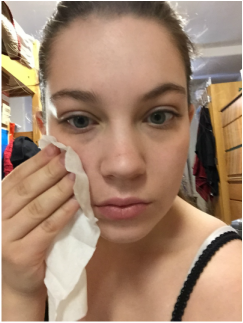
Step 1: Wash your face!
This is a general rule for all make-up. You don't want dirt and gunk to get trapped under your make-up. That causes acne. Plus, it feels better to have your face clean when you put on make-up.
This is a general rule for all make-up. You don't want dirt and gunk to get trapped under your make-up. That causes acne. Plus, it feels better to have your face clean when you put on make-up.
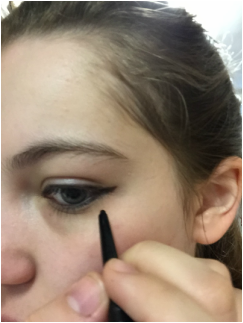
Step 2: Eyeliner
I decided to do a slight winged look with black eyeliner. You can probably do just about anything with your eyeliner for this, but this looked pretty cute in the end.
I decided to do a slight winged look with black eyeliner. You can probably do just about anything with your eyeliner for this, but this looked pretty cute in the end.
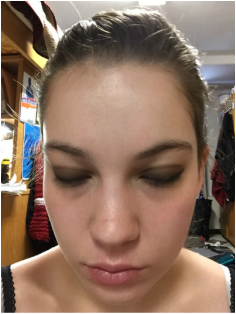
Step 3: Eyeshadow
I used a dark brown eyeshadow for my eyelids. You can choose your color based on whatever color pallet you choose. Mine was brown, so this worked best. No matter what colors you are doing, try to pick a darker shade for your eyelids.
I used a dark brown eyeshadow for my eyelids. You can choose your color based on whatever color pallet you choose. Mine was brown, so this worked best. No matter what colors you are doing, try to pick a darker shade for your eyelids.
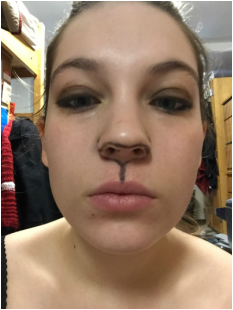
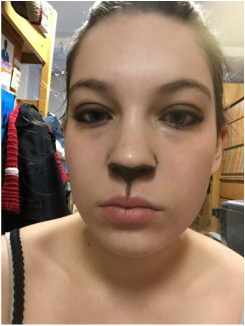
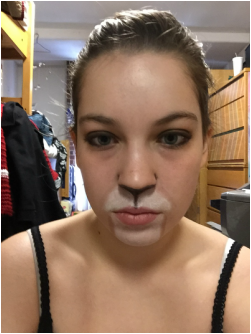
Step 4: Outline nose
Outline the underside of your nose with black face paint and draw a line in the middle down to your lip. I made a triangular shape where the under part of the nose connects with the line; it looks better. It also makes it more visible. It is up to you.
Outline the underside of your nose with black face paint and draw a line in the middle down to your lip. I made a triangular shape where the under part of the nose connects with the line; it looks better. It also makes it more visible. It is up to you.
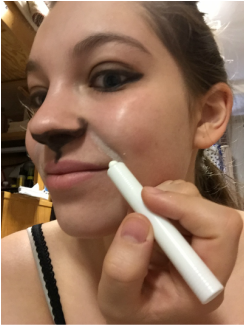
Step 5: Color in Nose
Color in the under part of the nose. This part is a little unpleasant. You have to color up into your nostrils a little otherwise it looks stupid. Don't worry, it washes out easily!
Color in the under part of the nose. This part is a little unpleasant. You have to color up into your nostrils a little otherwise it looks stupid. Don't worry, it washes out easily!
Step 6: Outline the space above your lips and below your nose
Smile. See the crevices from your checks? Trace those from the corner of your nose to the corner of your mouth with white face paint.
Smile. See the crevices from your checks? Trace those from the corner of your nose to the corner of your mouth with white face paint.
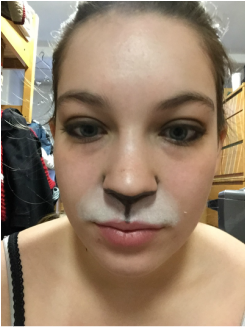
Step 7: Color it in
Color it in with white face paint. It will look blurry and messy right now. Don't worry, we will define it more later. This is just a base. Be careful not to smudge the black when you are doing this.
Color it in with white face paint. It will look blurry and messy right now. Don't worry, we will define it more later. This is just a base. Be careful not to smudge the black when you are doing this.
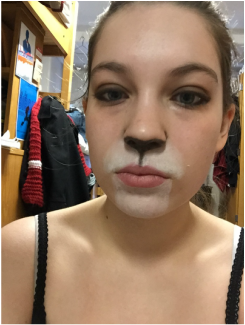
Step 8: Color the Chin
Draw a line from each corner of the mouth straight down to the chin. Between the two lines, trace the curve of your chin. Color in the space with white face paint.
Draw a line from each corner of the mouth straight down to the chin. Between the two lines, trace the curve of your chin. Color in the space with white face paint.
Step 9: Outline the white
Take your brown face paint and outline the white areas. Don't worry about how it looks yet, you will blend later.
Take your brown face paint and outline the white areas. Don't worry about how it looks yet, you will blend later.
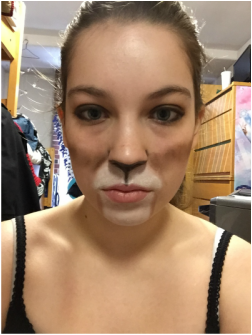
Step 10: Cheeks
Take the same eyeshadow that you used on your eyelids, and starting from the corners of your nose, rub the eyeshadow up towards your temple. Use your cheekbones as a guide. The line is about an inch thick. Don't blend yet.
Take the same eyeshadow that you used on your eyelids, and starting from the corners of your nose, rub the eyeshadow up towards your temple. Use your cheekbones as a guide. The line is about an inch thick. Don't blend yet.
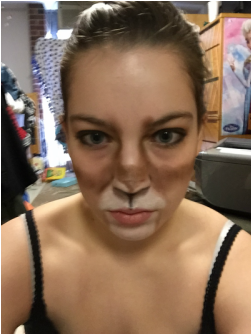
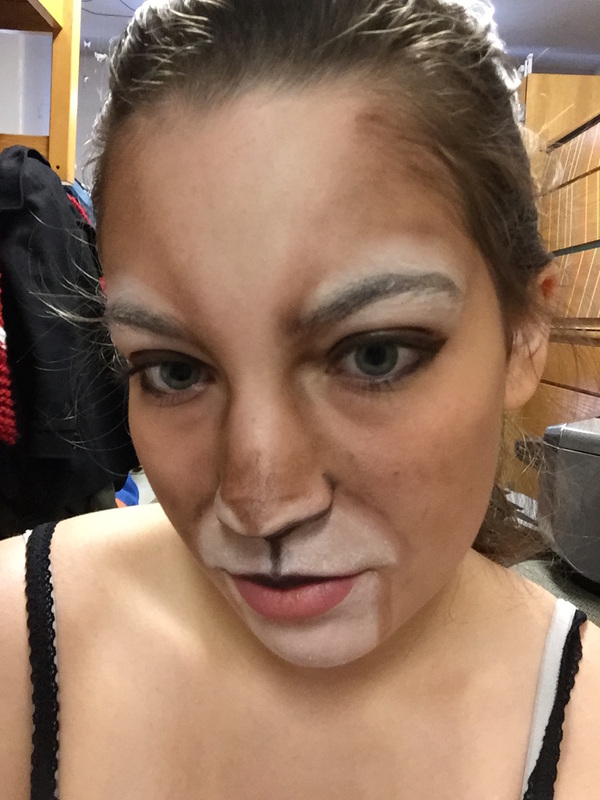
Step 11: More outlining
Take the your white face paint and outline the bottom edge of the top of your nose. Then use the brown eyeshadow from before to made a triangle shape on your nose as pictured. Outline your nose with the eyeshadow.
Take the your white face paint and outline the bottom edge of the top of your nose. Then use the brown eyeshadow from before to made a triangle shape on your nose as pictured. Outline your nose with the eyeshadow.
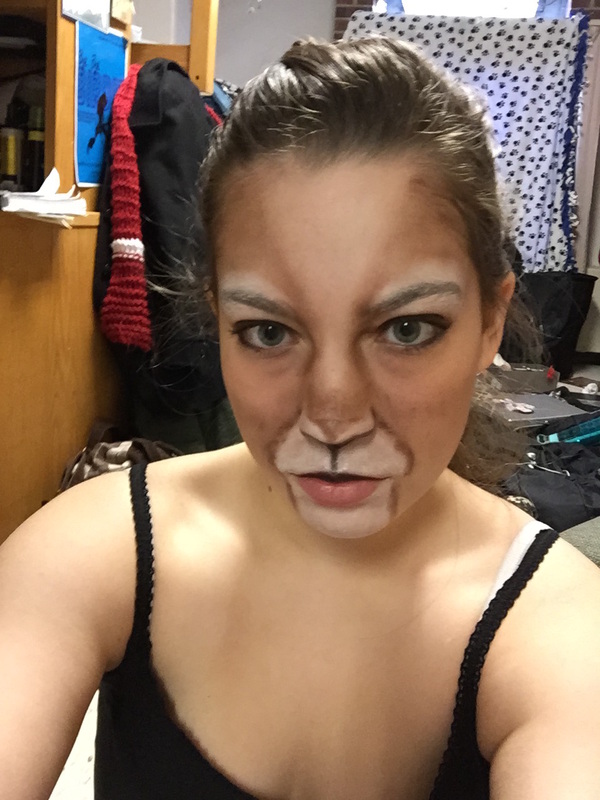
Step 12: Create a V shape on forehead
Extend the outline you made of your nose upward, making a V shape. Now take the white face paint and color above your eyelids and above the brow. Above that, fill in the space between the white and the brown lines you just made.
Extend the outline you made of your nose upward, making a V shape. Now take the white face paint and color above your eyelids and above the brow. Above that, fill in the space between the white and the brown lines you just made.

Step 13: Fill in blank spots
Using a shade lighter brown of eyeshadow, fill in the rest of the showing skin, excluding the forehead V. The forehead is a shade lighter than that.
Using a shade lighter brown of eyeshadow, fill in the rest of the showing skin, excluding the forehead V. The forehead is a shade lighter than that.
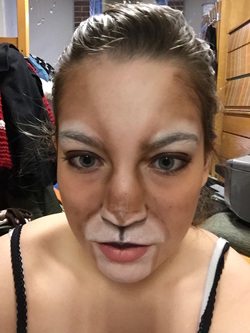
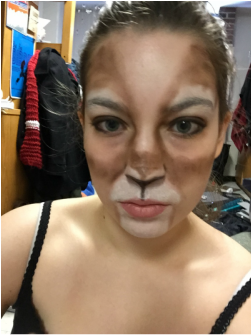
Step 14: Blend!
Blend in all that eyeshadow! I had some difficulty blending because I used cheap Walmart face paint, but it worked out all right in the end. Take your black lipstick and do only the top lip. I didn't have lipstick, so I just used face paint.
Blend in all that eyeshadow! I had some difficulty blending because I used cheap Walmart face paint, but it worked out all right in the end. Take your black lipstick and do only the top lip. I didn't have lipstick, so I just used face paint.
You are done! Here is the final look! If you want, you can re-outline the mouth area, or blend it in if you want. It looks kinda cheetah-like if you don't blend it. Again, this is stage make-up! It looks a little funky up close, but stunning on stage! All you need are horns and maybe long ears, and you are good!
What do you think? Do you have any tricks for stage make-up?


