
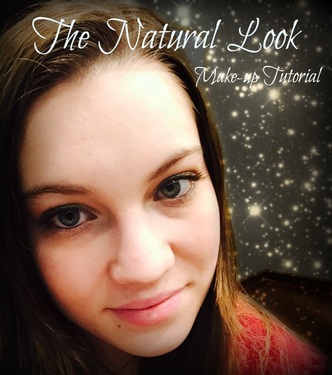
Today is Valentine's Day. Whether you are going out with friends or with a significant other, you ladies out there (or gentlemen, I don't judge!) will probably want to put on make-up, even if that is normally not your thing. Today is a special enough occasion that you want to feel nice, but not go all out. That is why the natural look is perfect! It covers up any skin imperfections, and just makes you feel confident in your own natural look.
I went to a Mary Kay make-up party today, so I can easily say that their make-up is great quality and not too expensive! You can buy some Mary Kay make-up here. If you can, try to find your local consultant and buy from them because they get half of the profit. It is a great way to support someone who is working towards their own goals. If you can't afford Mary Kay, drug store make-up will work too.
Here's what you need:
-Baby wipes
-Q-tips
-Liquid and powder foundation (Make sure it matches your skin tone!)
-Brush for the powder foundation and blush
-Any other brush you want for other make-up products that we will be using (I usually just use my finger)
-Black eyeliner
-Two shades of brown/tan or flesh-colored eyeshadow (One needs to be darker than the other. It needs to contrast, but don't go too dark. I like to go a shade or two darker than my skin tone for one, and a shade lighter or white for the other.)
-Black mascara
-Light pink blush
-Light pink lip gloss
1. Apply the liquid foundation
Put a dab of foundation on your finger, or a little bit on a foundation brush. Start from the bottom of your face and rub gently in circles in an upwards and outwards motion (you want to go against gravity). Don't forget to blend up to your ears and to do your chin and under your nose. Finish up by starting in the middle of your forehead and moving outwards and to your temples. Clean your hands with a baby wipe.
2. Apply the powder foundation
This works in the same way as the liquid foundation, but using a brush this time. I use both powder and liquid foundation because it creates a softer and more smooth look. It also hides any mess-ups. Make sure that your foundation is well blended.
3. Apply eyeliner
Start with the top. Take the finger of your non-dominant hand and place it on the outer corner of your eye. Gently pull outwards so that you can see your whole lash line. In light and short strokes, start in the middle of your lash line and move outwards. Try not to make it too thick and make sure that it is applied where your eyelashes come out of your lid. You don't want to see your skin between your eye and your eyeliner; it looks weird. Then finish it up by doing starting in the inner corner of your eye and make very thin lines towards the center. Repeat with the other eye. If you smudged, take a Q-tip and clean up a little. I usually wet the Q-tip a little with my tongue, place the Q-tip on the smudge and spin it. This helps because it doesn't smudge your eyeliner any further. Clean your hands if they got dirty again.
4. Eyeshadow!
This is my favorite part. Take the lighter shade and use your finger to apply it to your entire eyelid. Make sure that you get into the creases. Next, take the darker shade and start at the outer corner of your eye and move to the center of the eye. It should create a nice gradient. If you have an obvious line in the center of your eye, use a clean finger and DAB not rub the line until it is blended. Repeat with the other eye. If you go outside the lid of your eye, that is totally okay, as long as it is the same as the other eye. Use a baby wipe to clean up your hands.
5. Apply Mascara
You probably got some eyeshadow on your eyelashes. That is okay! Mascara covers that up! Take your mascara wand and carefully start at the base of your top eyelashes, starting from above (you will be doing the top of your eyelashes and moving downwards first). As you move downwards, also move side to side to avoid clumping. Now you will do the underside of your top eyelashes. Hold your brush still at the base of your lashes and blink. If it clumps, do the side to side motion with your wand again. Repeat with the other eye. I usually do the bottom lashes too, but it is totally optional. You start at the base of your lashes again, and carefully move downward. If you hit your skin, don't use your finger to wipe it up! Wait until you are done applying your mascara to take a Q-tip and remove it the same way you did with the eyeliner.
6. Apply Blush
Use your brush and apply the blush to your cheekbones, blending upwards towards your temple. Match it on your other cheek.
7. Apply Lipgloss!
I usually do my bottom lip first, put a little bit on the top lip, and then rub my lips together.
Viola! Now you are ready to show the world how beautiful you are!
What are some tricks that you like to do with make-up?


